
Noise and vibration in residential garage door systems stem from structural transfer, mechanical wear, and component friction. When a garage door operates, kinetic energy moves from the track and motor through the mounting brackets and directly into the house framing. In many homes, a living area or sleeping room situated directly above or adjacent to the garage suffers the worst acoustic impact. Implementing a targeted noise reduction strategy allows us to suppress up to 80 percent of operational sound without requiring a complete system overhaul.
Table of Contents
Diagnostic Blueprint and Key Technical Factors
Understanding the primary sources of mechanical noise allows home engineers and technicians to select the right components. Below are key technical parameters and diagnostic markers we evaluate during field inspections:
- Frictional Resistance: Metal-on-metal contact between traditional steel rollers and raw steel tracks creates high-frequency squealing and grind.
- Vibration Amplification: Motor vibrations move through unisolated angle iron directly into floor joists, creating a low-frequency hum throughout the living quarters.
- Panular Resonance: Single-skin non-insulated steel door panels act as acoustic drums, amplifying the vibration generated by track movement.
- Hardware Looseness: Micro-vibrations loosen hinge bolts and track brackets over time, causing harsh chatter during door travel.
- Stem and Track Sizing: Standard residential systems utilize either 2-inch tracks with standard 7-inch roller stems or heavy-duty commercial 3-inch tracks; installing incorrect stem dimensions causes binding and noise.
Root Causes of Excessive Garage Door Noise
We have inspected thousands of residential systems across varying climates. Most homeowners assume a noisy door signifies an expiring opener motor. In reality, the motor head is rarely the primary source of high-pitch screeching or heavy rattles.
The primary cause of severe acoustic transfer is structural resonance. When steel wheels roll across steel tracks, the mechanical friction generates high-frequency acoustic waves. Because garage door tracks are anchored to house framing using steel angle irons, these waves travel into the drywall and ceiling joists. This structural coupling turns the ceiling above the garage into a massive acoustic speaker.
Environmental factors accelerate this degradation. High ambient humidity corrodes unsealed steel ball bearings, causing them to lock up entirely. Once a steel roller stops rotating, it slides along the track, cutting grooves into the steel rails and creating a harsh grinding noise. Furthermore, temperature swings cause wood framing to expand and contract, loosening lag screws along track mounts and hinges.
According to safety and maintenance guidelines from the Door and Access Systems Manufacturers Association (DASMA), loose hardware and unlubricated components not only exacerbate noise but can also lead to premature wear on counterbalance springs and lifting cables.
Technical Breakdown of a Garage Door Noise Reduction Kit
A complete aftermarket noise reduction kit targets mechanical friction, kinetic transfer, and panel resonance. Knowing the engineered function of each component ensures proper selection and installation.
Nylon Rollers with Sealed Ball Bearings
Traditional steel rollers utilize unsealed ball bearings or basic sleeve bearings. High-grade noise reduction kits replace these with heavy-duty nylon or polyurethane wheels equipped with precision-sealed ball bearings (typically rated at 13 to 15 ball bearings per roller).
- Acoustic Absorption: High-density nylon dampens metal-on-metal contact, suppressing track vibration.
- Bearing Protection: Sealed bearing races keep out airborne dust, debris, and moisture, preserving factory lubrication for up to 100,000 cycles.
- Stem Integrity: Quality rollers feature zinc-plated or stainless steel stems to prevent rust and binding inside the hinge tube.
Vibration Isolators and Neoprene Bushings
Vibration isolation kits decouple the overhead opener rail from the building framework. These units consist of rubber or neoprene bushings sandwiched between heavy-gauge steel mounting plates.
- Kinetic Suppression: Rubber bushings absorb motor harmonics before they pass into ceiling joists.
- Thermal and Dynamic Flexibility: High-grade elastomeric compounds resist hardening under temperature extremes, maintaining isolation performance across summer heat and winter cold.
Sound Dampening Panels and Thermal Insulation
Adding mass to hollow metal panels lowers their resonant frequency. Foam panel kits or self-adhesive butyl sound-deadening sheets absorb mechanical flutter as the sections travel through the curved portion of the track.
- Mass-Loading Effect: Increases panel density, suppressing panel vibration and rattling.
- Thermal Efficiency: Polyurethane or expanded polystyrene insulation panels improve heat retention, providing secondary energy efficiency benefits.
Structural Realities: Complex Case Studies from the Field
To illustrate how targeted interventions fix complex acoustic issues, we present two real-world case studies from our field engineering records.
Case Study 1: Structural Resonance in a Multi-Story Floorplan
- The Problem: A homeowner reported a deep, low-frequency hum that vibrated the floorboards of a nursery directly above the garage. The opener was a quiet belt-drive motor, but the noise level inside the nursery reached 68 decibels during door operation.
- The Assessment: Our team discovered that the installer had lag-bolted the motor hanging straps directly into a structural steel I-beam running beneath the bedroom floor. The metal-to-metal connection transmitted motor vibrations throughout the second-floor framing.
- The Resolution: We re-engineered the opener support using heavy-duty rubber vibration isolation mounts and installed custom neoprene rubber spacers at all track ceiling support points. We also swapped out the factory steel rollers for 13-ball bearing nylon rollers.
- The Outcome: Sound pressure levels inside the nursery dropped from 68 decibels to 39 decibels during door travel, effectively eliminating the low-frequency hum.
Case Study 2: High Humidity Corrosion and Track Binding
- The Problem: A 12-year-old double-car garage door created a screeching, metallic grinding sound during operation, frequently causing the opener’s safety force sensors to trip and reverse the door.
- The Assessment: High seasonal humidity had rusted the steel roller stems into the hinge sleeves. Four out of ten steel rollers had seized completely, flat-spotting the wheels and scoring the internal track surface.
- The Resolution: We removed the damaged track sections, polished out light track scoring, and installed commercial-grade nylon rollers with 8-inch zinc-plated stems. We replaced all rusted side hinges with 14-gauge zinc-coated steel hinges equipped with nylon sleeve inserts. Finally, we lubricated all pivot points with a high-tack synthetic spray lubricant.
- The Outcome: Mechanical drag dropped significantly, allowing the door to pass manual balance tests smoothly while operational noise was reduced by 72 percent.
System Comparison: Upgrades and Cost Efficiency
Evaluating different quiet-mode options helps determine whether a localized component swap or a complete system replacement provides the best return on investment.
| Solution Approach | Estimated Hardware Cost | Sound Level Reduction | Installation Time | Typical Lifespan | Primary Benefit Target |
|---|---|---|---|---|---|
| Nylon Roller Upgrade | 35 to 65 US dollars | 50% to 60% | 45 minutes | 10 to 15 Years | Eliminates track grinding and squealing |
| Motor Vibration Isolation Kit | 20 to 45 US dollars | 30% to 40% | 30 minutes | 15+ Years | Eliminates ceiling joist humming |
| Full Noise Reduction Kit | 90 to 220 US dollars | 70% to 80% | 2 to 3 Hours | 10 to 12 Years | Comprehensive mechanical dampening |
| Belt-Drive Opener Conversion | 250 to 450 US dollars | 85% to 90% | 2 to 4 Hours | 12 to 15 Years | Replaces noisy chain drives |
| Complete Insulated Door Swap | 1,200 to 3,500 US dollars | 90% to 95% | 4 to 6 Hours | 20+ Years | Maximum thermal and acoustic control |
Step-by-Step Installation Protocol
If you plan to perform this retrofit yourself, follow this tactical field procedure to ensure safety and system alignment.
Step 1: System Disconnect and Mechanical Isolation
- Disconnect electric power to the garage door opener head unit.
- Pull the emergency release cord to disengage the trolley carriage from the opener rail.
- Place locking pliers or c-clamps on both vertical tracks directly above the second roller to prevent the door from moving unexpectedly.
Step 2: System Roller Replacement Protocol
- Replace rollers one at a time. Never remove multiple hinge brackets simultaneously, as this can cause the door panels to shift or fall.
- Unbolt the hinge fasteners securing the target roller bracket to the door panel.
- Angle the hinge stem out of the track, slide out the worn roller, and insert the new nylon roller.
- Seat the roller back into the track rail, align the hinge over its original mounting holes, and secure it with high-torque fasteners.
- Repeat this step for all side rollers. Caution: Do not unbolt the bottom corner brackets. These brackets are under intense tension from the counterbalance spring cables.
Step 3: Opener Isolation Mount Installation
- Support the motor unit securely using an adjustable ladder or secondary support prop.
- Disconnect the steel support straps from the opener housing hanger brackets.
- Insert rubber vibration isolator blocks between the ceiling mounting brackets and the motor hanging straps.
- Secure all bolts using lock washers or thread-locking compound to prevent nuts from backing off due to residual vibration. Technical specifications and isolation tolerances can be referenced directly through the LiftMaster Official Site.
Step 4: Fastener Calibration and Lubrication
- Inspect every track bracket, hinge, and rail junction bolt across the entire assembly.
- Tighten any loose lag screws into the wall framing using a socket wrench. Avoid overtightening into wood framing to prevent stripping the wood fibers.
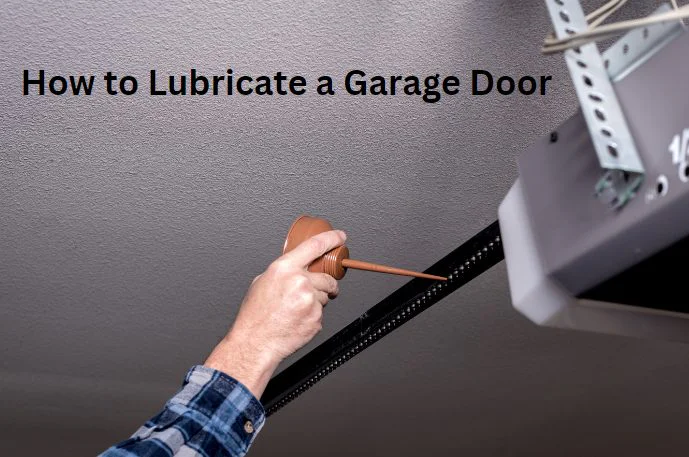
- Apply a generous coating of non-tacky silicone or Teflon spray lubricant to all hinge pivot points, roller bearing races, torsion springs, and end-bearing plates. Avoid using multi-purpose petroleum solvents or thick lithium grease, as they attract grit and create an abrasive paste.
Decision Matrix: Kit Retrofit vs. System Replacement
Not every noisy garage door can be saved with an aftermarket kit. Review this decision matrix before spending money on hardware:
When a Noise Reduction Kit Is the Right Choice
- The current door panel structure is less than 15 years old and free of deep structural rust or panel warpage.
- The door opens and closes manually without binding or heavy resistance.
- The noise is primarily characterized by high-pitch wheel squeaks, track chatter, or ceiling frame hum.
- The counterbalance springs are properly tensioned and maintain door position when tested manually at mid-travel.
When You Should Upgrade the Entire System
- The door utilizes single-skin steel panels that are bent, cracked, or severely corroded.
- The opener motor is an outdated, chain-driven unit manufactured before 1993 lacking modern safety reverse sensors.
- The counterbalance torsion springs are severely rusted, stretched, or mismatched for the door weight.
- The track rails themselves are twisted, pinched, or rusted through at floor level.
Frequently Asked Questions
Will a noise reduction kit completely silence my garage door?
No mechanical system with moving parts under load can be made completely silent. A high-quality noise reduction kit will eliminate harsh metal-on-metal grinding, rattling, and structural hum, reducing operational sound levels by up to 80 percent. You will still hear a quiet motor hum and the soft movement of the door panels through the track bend.
Can I replace the rollers on the bottom bracket myself?
You should not remove or unbolt the bottom corner brackets yourself. The bottom brackets on a sectional garage door are attached directly to high-tension lifting cables connected to the counterbalance springs. Unbolting these brackets while the system is under tension can cause severe personal injury. Replacing bottom rollers requires specialized cable-detensioning tools and should be handled by a trained technician.
Why shouldn’t I use standard WD-40 spray on garage door tracks and rollers?
Standard WD-40 multi-use product is primarily a solvent and water-displacer, not a long-term lubricant. While it initially cleans away old grease, it evaporates quickly and leaves the metal surfaces bare and prone to accelerated friction and rust. Additionally, solvent sprays break down factory grease inside sealed bearings. Always use a dedicated garage door lubricant formulated with silicone or PTFE.
How do I know if my garage door opener vibration isolators are installed correctly?
Vibration isolators are installed correctly when the elastomeric rubber grommet or block sits firmly between the metal hanging strap and the motor mounting chassis without being crushed completely flat. If the mounting bolts are over-tightened to the point where the rubber flattens entirely, metal-to-metal contact is re-established, defeating the isolation properties of the rubber mount.
How long do nylon garage door rollers last compared to traditional steel rollers?
High-grade nylon rollers equipped with 13-ball or 15-ball sealed bearings are typically rated for 100,000 door open-and-close cycles, which translates to 12 to 20 years of normal residential use. Unsealed standard steel rollers typically begin degrading and generating noise within 3 to 7 years, especially in humid or unconditioned garage spaces.
Sources
- Door and Access Systems Manufacturers Association (DASMA): https://www.dasma.com/
- LiftMaster Official Site and Technical Documentation: https://www.liftmaster.com/
- ANSI/DASMA 102-2018 Specifications for Sectional Overhead-Type Doors: https://www.dasma.com/standards/

