
Let’s be honest, the moment you get that smart garage door opener kit delivered, you’re already picturing it. Pulling into your driveway in Sandy Springs, tapping your phone, and watching the door glide up before you even step out of the car. It’s a small luxury that feels like the future. But between that dream and the reality lies a tangle of wires, compatibility charts, and the nagging question: “Is this going to brick my perfectly good opener?”
We’ve integrated more of these systems than we can count, both for customers and in our own shops. The key takeaway? It’s absolutely a doable DIY project, but your success hinges entirely on three things: choosing the right kit for your specific opener, understanding the very real safety protocols, and managing your expectations about what “smart” actually means for your daily life.
Key Takeaways
- The right smart hub is determined by your existing opener’s brand and model, not just price. A mismatch is the most common DIY failure point.
- Garage door safety systems (photoelectric eyes and auto-reverse) are non-negotiable. Your project starts with testing them, not installing tech.
- True “smart” integration requires a reliable hub (like a MyQ Gateway, Tailwind iQ3, or Ratgdo) and often a separate smart home ecosystem (Apple HomeKit, Google Home, Alexa).
- Professional help isn’t a failure; it’s a strategic choice for complex wiring, older openers, or when your time and risk tolerance are low.
Table of Contents
What Are You Actually Installing?
First, let’s clear up the terminology, because marketing loves to blur the lines. You’re not really buying a “smart opener.” You’re buying an accessory that makes your existing dumb opener smart. This accessory usually comes in one of two forms:
A Smart Hub or Controller: This is a physical device you mount inside your garage. It connects to your opener’s motor unit and to your home Wi-Fi. It acts as the bridge, allowing your phone app to send an “open” or “close” signal over the internet to the device, which then mimics the button press on your wall control. Brands like Chamberlain’s MyQ are the most common here.
A Direct-Drive Smart Opener: This is a less common but elegant solution. It replaces your entire existing opener motor with a new, sleek unit that has smart capabilities built right in. Brands like Tailwind and others offer these. It’s a bigger project, but often cleaner.
For most Sandy Springs homeowners looking to dip a toe in, the smart hub/add-on route is the starting point.
The Critical First Step: Know Your Opener
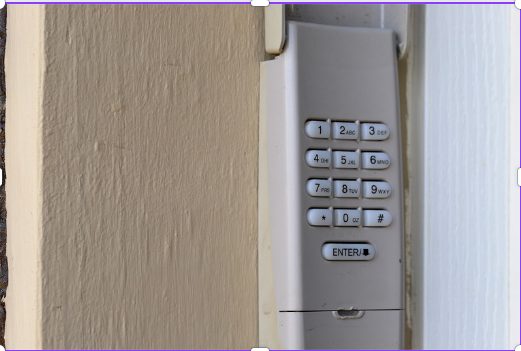
This isn’t a suggestion; it’s the law of this project. Your opener’s brand and model number dictate everything. You’ll find a label on the motor unit itself—usually a silver rectangular box hanging from your garage ceiling. Get on a ladder, write it down, and have it handy before you even browse Amazon.
Why does this matter so much? Wiring and communication protocols. A kit designed for a 2020 Chamberlain LiftMaster won’t play nice with a 1995 Genie Screw Drive or an ancient Craftsman chain-drive. The connectors are different, the voltage on the terminals can be different, and the security protocols are definitely different. Buying blind is the fastest way to waste an afternoon and $120.
The Non-Negotiable: Safety Before Smart
Here’s the part where we put on our professional hat. Every modern garage door opener has two crucial safety features mandated by federal law since 1993: the photoelectric eyes and the auto-reverse mechanism.
Photoelectric Eyes: Those little lenses near the bottom of your door tracks. They create an invisible beam. If anything breaks that beam while the door is closing, the door must immediately reverse. Before you touch any tech, test this. Wave a broom handle in the beam’s path while closing the door. Does it reverse? Good. If not, your project stops here until they’re fixed.
Auto-Reverse: Test this by placing a 2×4 or a roll of paper towels flat on the ground where the door would close. Start closing the door. The bottom edge of the door should hit the object and reverse back up within two seconds. If it doesn’t, the sensitivity needs adjustment.
We can’t stress this enough: A smart opener that can close a door on a car, a pet, or a child is a dangerous liability. This isn’t about the tech; it’s about basic mechanical safety. If you’re unsure, this is the exact moment to call a pro. In Atlanta’s older neighborhoods like Buckhead or Virginia-Highland, where openers can be decades old, this check is even more critical.
Choosing Your Path: The Major Player Breakdown
Not all smart ecosystems are created equal. Your choice will define your daily experience. Let’s break down the real-world use of the main options.
The Walled Garden: MyQ by Chamberlain/LiftMaster
If your opener is a Chamberlain, LiftMaster, or Craftsman (made by Chamberlain), you’re likely already in the MyQ ecosystem. Many newer models have the tech built-in, just waiting for you to enable it via the app.
The Reality: MyQ is reliable for basic open/close and scheduling from its own app. However, it’s famously a walled garden. For years, Chamberlain has actively blocked its system from integrating seamlessly with universal smart home platforms like Apple HomeKit or Google Home. You can’t just say “Hey Google, close the garage door.” You need workarounds involving third-party bridges, which adds complexity.
Our Take: It’s a solid, secure system for remote viewing and control via its proprietary app. If you want deep integration with your other smart home devices, be prepared for extra steps and potential frustration.
The Universal Integrators: Tailwind iQ3 and Ratgdo
This is where the true tech enthusiasts go. These devices are designed from the ground up for seamless smart home integration.
- Tailwind iQ3: This is a favorite of ours for its elegance. It doesn’t just mimic a button press; it connects directly to the opener’s internal circuitry and can read the door’s exact position (open, closed, moving). This allows for brilliant automation like “close my garage door when my car leaves geofence.” It works natively with Google Home, Alexa, and, importantly, Apple HomeKit.
- Ratgdo: An open-source option that’s gained a cult following for its ability to fully unlock MyQ openers and bring them into platforms like HomeKit. It’s for the tinkerer who doesn’t mind a slightly more technical setup.
Our Take: If your goal is a truly automated home where the garage door is an actor in scenes and routines (e.g., “Goodnight” scene locks doors, turns off lights, and ensures the garage is closed), these are the superior choices. They treat the opener as a first-class citizen in your smart home, not an isolated gadget.
The Installation: More Than Just Plugging In
You’ve chosen your kit. You’ve passed the safety tests. Now for the install. The manuals are generally decent, but here are the field notes you won’t find in the booklet:
- Power Down Everything. Unplug the opener from the ceiling outlet. Not just the wall switch—the actual plug. This is for your safety and to prevent any electrical surges during connection.
- Mount the Hub Strategically. You need three things: proximity to your opener’s motor unit (for the wire), a strong Wi-Fi signal (2.4 GHz band, almost always), and access to a power outlet. Don’t tuck it behind metal ductwork where it’ll kill the Wi-Fi signal. We see this all the time.
- Mind the Terminals. Your existing wall control button connects to two terminals on your opener (often labeled 1 & 2 or “P” and “C”). Your smart hub will have its own wires that need to connect to these same terminals, usually in parallel. This is where knowing your model is key—the colors and connectors vary. If your kit uses a physical pass-through dongle, take your time seating it firmly.
- The Wi-Fi Dance. Have your 2.4 GHz network name and password ready. Most smart home devices still use this band for its better range through walls. Your phone may be on 5 GHz; you might need to switch networks temporarily during setup.
- Test Extensively Before Finalizing. Don’t screw the hub cover on and clean up just yet. Test the function from the app 5-10 times. Test the physical wall button. Test the safety sensors again. Ensure everything coexists peacefully.
When DIY Meets Reality: Common Hiccups & Trade-Offs
| Scenario | Likely Cause & DIY Fix | When to Call a Pro (Like Us) |
|---|---|---|
| App says “Offline” | Weak Wi-Fi signal in garage. Try a Wi-Fi extender. Or, hub lost power/needs reboot. | Persistent connectivity issues may require a low-voltage wiring run for an access point, which is beyond most DIY. |
| Door responds slowly or inconsistently to app | Internet latency or hub placement. Check your home internet speed. | If the delay is dangerous (e.g., door doesn’t respond when you’re leaving), the system isn’t reliable enough. |
| Smart hub works, but wall button doesn’t (or vice versa) | Incorrect wiring at the terminals. Re-check the parallel connection diagram for your specific model. | If you’re uncomfortable with electrical terminals (even low-voltage), a miswire can damage the opener’s logic board. |
| Opener makes a grinding noise or strains after install | STOP. The installation likely didn’t cause this. Your door’s springs or balance are likely the issue. | Immediately. A garage door under tension is the most dangerous part of the system. This is 100% a pro job. The CPSC has clear warnings about garage door spring repair. |
| Want Apple HomeKit but have a MyQ opener | You’ll need a third-party bridge (like Homebridge on a Raspberry Pi) or to install a Ratgdo. This is a tech-project-within-a-project. | If the thought of configuring a Raspberry Pi makes you sweat, a pro can install a native HomeKit solution like Tailwind, often for less than you think. |
The Atlanta-Specific Considerations
Our climate here in North Georgia throws some curveballs. Humidity can affect wireless signals. The pollen in spring is so thick it can coat external antennae. More importantly, many homes in Sandy Springs, Dunwoody, and Brookhaven have older, larger wooden garage doors. They are heavy. A smart opener can operate them, but it puts more strain on the entire system. If your opener is already 15 years old and groaning, adding a smart hub might be the final straw. Sometimes, the smarter long-term investment is a new, modern direct-drive smart opener that’s matched to the door’s weight from the factory.
So, Is It Worth It?
For the prepared and patient tinkerer, absolutely. The convenience is real. Letting in a cleaner or a contractor remotely, getting alerts if you forget to close the door, or having it close automatically at 9 PM—these are genuine quality-of-life upgrades.
But it’s not a trivial plug-and-play. It requires research, careful installation, and an understanding of the underlying mechanics. Your time, confidence, and the age/condition of your existing system are the real deciding factors.
For every homeowner who proudly shows us their DIY setup, we meet another who handed us the unopened box with a weary smile and said, “I value my Saturday more than this fight.” Both are perfectly valid choices. The goal isn’t to be the smartest house on the block; it’s to have a garage that works for you, reliably and safely, day in and day out. Sometimes that starts with a screwdriver and a Wi-Fi password, and sometimes it starts with a quick phone call to a local who’s seen it all before.
People Also Ask
Yes, you can turn your standard garage door opener into a smart one. The most common method is to purchase a smart garage door control module or a Wi-Fi hub that connects to your existing opener. These devices typically install in minutes, attaching to the opener's wall button terminals, and then connect to your home network. Once set up, you can open and close the door from a smartphone app and receive alerts about door activity. For professional installation and compatibility advice in the Atlanta area, Atlanta Garage Doors can help ensure your setup works reliably. For more details, please refer to our internal article Frequently Asked Questions: Atlanta Garage Doors.
To connect a smart garage door opener, first ensure your opener is compatible with the smart device you are using. Most modern openers require a stable Wi-Fi connection near the garage. Begin by downloading the manufacturer's app and creating an account. Press the "Learn" or "Smart" button on your garage door opener motor unit, usually located near the antenna wire. Then, follow the app's instructions to connect your opener to your home network. For Chamberlain models, you can refer to our internal article titled How To Reset A Chamberlain Garage Door Opener? for specific troubleshooting steps. If you encounter pairing issues, check that your router is not too far from the garage. Atlanta Garage Doors recommends placing a Wi-Fi extender if needed to maintain a strong signal for reliable smart operation.
Not all garage door openers can be upgraded with myQ technology. The myQ system is designed to work with most openers manufactured after 1993 that use a standard wall button. However, compatibility depends on the opener's motor type and wiring. For openers with a standard momentary contact wall button, you can often install a myQ smart hub or a myQ-enabled wall control panel. Openers with a security+ 2.0 system, commonly found in Chamberlain and LiftMaster models, are generally easier to retrofit. If your opener uses a different protocol or has a proprietary wall station, adding myQ may require a specific adapter or may not be possible. For a detailed guide on resetting a compatible Chamberlain model, please refer to our internal article: How To Reset A Chamberlain Garage Door Opener?. For professional advice on your specific opener, Atlanta Garage Doors can assess your system and recommend the best smart upgrade path for your home.
Yes, you can add Wi-Fi to most garage door openers using a Wi-Fi hub or a smart upgrade kit. These devices connect to your existing opener and your home network, allowing you to control the door from your smartphone. For optimal compatibility, we recommend reviewing our article Smart Garage Door Openers Compatible With Atlanta Home Systems to ensure your system works with Atlanta home automation setups. Professional installation is often advised to guarantee proper pairing and security settings. Atlanta Garage Doors can help you select and install the right Wi-Fi module for your specific model.

