
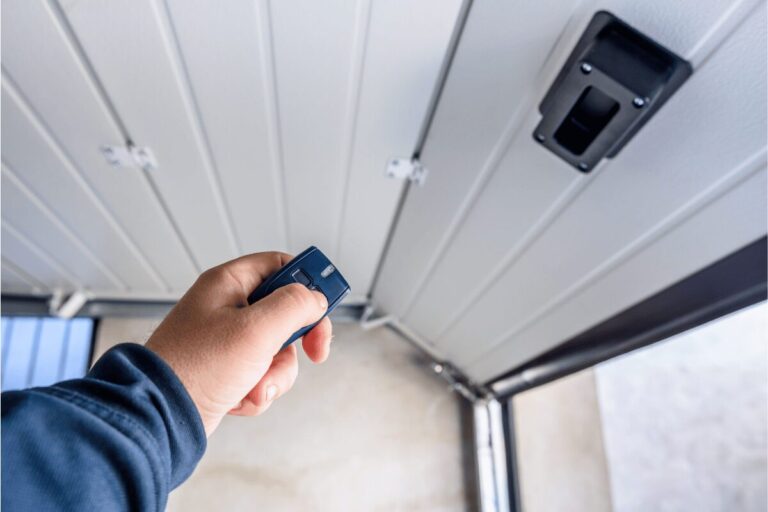
You’ve pulled the red emergency release cord on your Genie garage door opener, and now it won’t work right. We’ve seen this exact scenario hundreds of times. The door is stuck in manual mode, hanging loose on the tracks, and the opener just clicks or runs without engaging. It feels broken, but I promise you, it almost certainly isn’t. This is a simple reset process that gets overlooked because the crucial final step isn’t intuitive. Let’s get your system back to normal.
Key Takeaways
Pulling the red cord disengages the opener from the door, putting it in manual mode. Resetting it isn’t just about re-engaging the trolley; you must fully travel the door manually to reset its limits. The most common mistake is not lifting the door all the way up by hand before trying the opener, which causes the system to misread its position. If the door is heavy or you’re unsure, calling a pro is always the safer bet.
The Consumer Product Safety Commission (CPSC) has clear guidelines on garage door safety, and understanding how your emergency release functions is part of that. It’s a critical safety feature, not a glitch.
Table of Contents
What That Red Cord Actually Does
First, let’s demystify the hardware. That red cord is attached to the emergency release mechanism on the trolley—the part that moves along the rail above your door. In a normal, closed position, the trolley is physically latched onto the carriage that’s connected to your door’s top bracket. When you pull the cord, you un-latch it. This completely separates the motorized opener from the door itself. It’s designed so you can open the door manually during a power outage or if something is obstructing the path.
The problem arises because the opener’s brain—its logic board and travel limit settings—has no idea you’ve done this. It still thinks it’s connected to the door. So when you later try to use the wall button or remote, the motor runs, moving the trolley, but it’s just buzzing along the rail without moving the door. That’s the frustrating clicking or grinding sound you hear.
The Reset Process, Step by Step (And Where Everyone Stumbles)
Here’s the straightforward fix. The magic is in step 3.
-
Ensure the Door is Fully Down. Start with the door in the closed position, sitting on the floor. This is your baseline. If it’s partially open, gently lower it until it’s fully down. This gives you a clean starting point for the manual reset.
-
Re-engage the Opener. This is the part most guides cover. Locate the release handle (the one you pulled). You’ll see a thin, metal rod or cable running from it to the trolley. You need to pull this handle toward the door, not straight down. As you pull toward the door, you should hear and feel a solid “clunk” as the trolley re-latches onto the door’s carriage. A good way to test this is to try lifting the door manually by hand a few inches. If it’s re-engaged, the trolley and opener motor will move with the door. If it’s not, the door will lift freely while the trolley stays put.
-
The Critical, Non-Negotiable Step: Manual Travel. This is where 90% of DIY resets fail. You must manually lift the entire garage door all the way to the fully open position. Don’t use the opener. Use your hands. Lift it smoothly along its tracks until it stops, seated completely open. Why? The opener sets its “up” and “down” travel limits by physically sensing resistance. By manually taking the door through its full cycle, you’re essentially showing the system, “See? This is the path. These are the endpoints.” It recalibrates the internal memory.
-
Operate with the Opener. Now, press the wall button to close the door. It should engage immediately and lower the door. Once it’s down, operate it again to open. It should run smoothly. If it only goes partway or reverses, you likely didn’t get a full manual cycle in step 3.
When the Simple Reset Doesn’t Work: Common Hang-Ups
Sometimes, it’s not so easy. Here are the real-world hiccups we encounter daily.
- The Door is Too Heavy. This is the big one, especially with older wooden doors or modern insulated steel ones. If you can’t safely lift the door all the way open by yourself, you cannot complete the reset. Forcing it is a great way to throw out your back or lose control of a 150+ pound door. This is your first sign to call a professional. We have the tools and strength to do it safely.
- The Trolley Won’t Re-Latch. Sometimes the mechanism gets gummed up with old grease or dust, or the alignment is slightly off. You might pull the handle toward the door and not hear that click. Don’t keep yanking on it. A gentle wiggle of the door or a light tap with a rubber mallet on the trolley can help it seat. If it’s stubborn, forcing it can break the plastic parts inside—a repair that costs more than a service call.
- The Opener Runs But The Door Doesn’t Move. If you’ve re-latched it but the motor just hums or the door jerks and stops, you likely have a separate issue. The spring system, which counterbalances 95% of the door’s weight, might be broken. Do not attempt to fix garage door springs yourself. This is the most dangerous part of the system. A broken spring means the opener motor cannot lift the dead weight, and trying to force it can burn out the motor. This is a job for pros with the right tensioning tools.
Why This Happens More Often Than You’d Think
We get this call constantly, and not just from people practicing for a power outage. The most common trigger? Kids. They see the red cord dangling and give it a pull. A close second is accidentally snagging the cord with a ladder, a long piece of lumber, or a bicycle handlebar when you’re maneuvering in the garage. In older homes in neighborhoods like Virginia-Highland or Decatur, where garages are often tight storage spaces, it happens all the time.
Atlanta’s humidity plays a role, too. Over time, it can cause metal parts on the track to develop a slight bind, making that manual lift in step 3 feel even heavier. If your door doesn’t roll smoothly on its tracks by hand before you ever pull the red cord, you’re going to have a hard time with the reset. A bit of silicone-based lubricant on the rollers and tracks (not the springs!) is good preventative maintenance.
The Professional’s Perspective: When to Call It
Look, we’re in the business of fixing doors, but we’re also in the business of preventing injuries and costly mistakes. Here’s my honest take on when to put the tools down and pick up the phone.
| Scenario | DIY Feasibility | Pro Recommendation & Why |
|---|---|---|
| Standard lightweight steel door, rolls smoothly. | Good to go. | Follow the steps above. You’ve got this. |
| Door is heavy, binds slightly, but you can lift it. | Proceed with caution. | Have a helper. If anything feels stuck, stop. |
| Door is very heavy, you struggle to lift it 1/4 way. | Stop. Call a pro. | Risk of injury and door damage is high. |
| Trolley won’t re-latch after several gentle tries. | Stop. Call a pro. | Forcing it breaks parts. We can fix it in minutes. |
| You hear a loud “twang” or see a gap in the spring. | Stop immediately. Call a pro. | The spring is broken. This is a hazardous situation requiring specialized tools and knowledge. |
| Opener hums but door won’t budge after re-latch. | Diagnostic needed. | Could be a broken spring, a bound roller, or a failing motor. Let us diagnose safely. |
The trade-off is simple: an hour of your Saturday and potential risk versus a 15-minute service call from a technician who does this dozens of times a week. For many folks in Atlanta, GA, especially with older, heavier doors, the latter is the smarter play. We at Atlanta Garage Doors see it not as a failed DIY attempt, but as a smart decision to prioritize safety.
Beyond the Reset: Making Sure It Stays Fixed
Once you’ve got it working, let’s make sure it doesn’t happen again accidentally. Loop that red cord up and secure it with a zip tie or a twist tie so it’s not dangling freely. Leave just enough slack that you can still pull it in a genuine emergency, but it’s out of the way of casual snags.
While you’re at it, test your door’s safety features. Place a 2×4 on the floor under the center of the door. Close the door. When it hits the wood, it should automatically reverse within a second or two. If it doesn’t, your safety sensors are misaligned or faulty—a serious issue that needs immediate attention.
Wrapping Up
Pulling the red cord on your Genie opener isn’t a mistake; it’s using a safety feature as intended. The reset is about understanding that the system needs a manual recalibration. Lift the door fully by hand, and you’ll almost always solve the problem. But listen to what the door is telling you. If it’s fighting you, or something just doesn’t look or sound right, there’s no shame in getting a hand. The goal is a door that works safely and reliably, whether you get there yourself or with a little help from your local technician. Sometimes, the smartest DIY move is knowing when to delegate.
[
  {
    "@context": "https://schema.org",
    "@type": "Article",
    "headline": "How To Reset Garage Door After Pulling Red Cord Genie",
    "description": "A practical guide from industry experience on resetting your Genie garage door opener after using the emergency release, including common mistakes and when to call a professional.",
    "author": {
      "@type": "Organization",
      "name": "Atlanta Garage Doors"
    },
    "publisher": {
      "@type": "Organization",
      "name": "Atlanta Garage Doors",
      "logo": {
        "@type": "ImageObject",
        "url": "((INSERT LOGO URL))"
      }
    },
    "datePublished": "((INSERT PUBLICATION DATE))",
    "dateModified": "((INSERT MODIFICATION DATE))",
    "mainEntityOfPage": {
      "@type": "WebPage",
      "@id": "((INSERT POST URL))"
    },
    "image": {
      "@type": "ImageObject",
      "url": "((INSERT FEATURED IMAGE URL))"
    },
    "url": "((INSERT POST URL))",
    "@id": "((INSERT POST URL))"
  },
  {
    "@context": "https://schema.org",
    "@type": "Table",
    "name": "When to DIY a Garage Door Reset vs. Call a Professional",
    "description": "A practical decision guide based on common scenarios to help assess the risk and feasibility of resetting a garage door opener after pulling the emergency release cord.",
    "about": "Garage door repair safety and troubleshooting"
  }
]
Related Articles
How To Reengage Garage Door Remote
How To Reset Garage Door After Pulling Emergency Release LiftMaster
How To Open Genie Garage Door Without Power
People Also Ask
When you pull the red emergency release cord, your garage door disconnects from the opener, allowing manual operation. To reset it, first ensure the door is fully closed. Then, pull the red cord straight down and toward the opener, which re-engages the carriage trolley. You should hear a distinct click when the mechanism locks back into place. After that, press the wall button or remote once to confirm the opener moves the door smoothly. If the door only runs one way or stops, the trolley may be misaligned; simply repeat the process with the door closed. For persistent issues, Atlanta Garage Doors recommends checking the manual release lever for debris or wear, ensuring a safe and secure reconnection every time.
After pulling the emergency release cord, your garage door opener is disengaged from the trolley, so it will not respond to the wall button or remote. To reconnect, first ensure the door is fully closed. If it is not, manually lower it to the floor. Next, pull the release cord toward the motor unit until you hear a distinct click, which indicates the trolley has re-engaged with the drive chain or belt. You may need to press the wall button once to reset the system. If the door still runs rough, check that the carriage is aligned. For persistent issues, Atlanta Garage Doors can inspect the mechanism to ensure safe, smooth operation.
To reengage your Genie garage door opener, you first need to locate the emergency release cord, which is typically red and hangs from the trolley. Pull this cord straight down to disengage the carriage from the drive chain, allowing you to operate the door manually. Once you are ready to reconnect, simply pull the cord again toward the motor unit until you hear a distinct click, indicating the trolley has locked back onto the chain. Ensure the door is fully closed before reengaging to avoid tension issues. If the door feels heavy or the motor strains, check the track alignment. For persistent problems, Atlanta Garage Doors offers professional service to ensure your system operates safely and smoothly.
Pulling the red cord on your garage door opener disengages the trolley from the carriage, switching the system to manual operation. This is a crucial safety feature for emergencies, such as a power outage or if the door is stuck and needs to be opened manually. However, you must only pull this cord when the door is fully closed. If you pull it while the door is open, the door will crash down due to gravity, which can cause serious injury or property damage. Once the cord is pulled, you can move the door by hand. To reconnect, simply pull the cord again and run the opener until it clicks back into place. For any complex issues or if the mechanism feels stuck, contact Atlanta Garage Doors for professional inspection and service.
Pulling the red emergency release cord on your Genie garage door opener disconnects the carriage from the trolley, allowing manual operation. To reset it, first ensure the door is fully closed. Then, simply pull the red cord straight down and toward the motor head, or pull it away from the door, to re-engage the trolley. You should hear a distinct click. If the door is not closed, you must manually lower it before re-engaging. After reconnecting, press the wall button once to confirm the carriage locks back onto the drive chain. If the door still runs on the track but the motor runs free, the trolley may be misaligned. For persistent issues, Atlanta Garage Doors recommends checking your Genie's manual for the specific carriage reset procedure, as models vary slightly.
Pulling the red emergency release cord disconnects your garage door from the carriage, allowing manual operation. To reset it, first ensure the door is fully closed. Then, pull the red cord toward the motor unit (usually at a slight angle) to re-engage the trolley. You should hear a distinct click when the mechanism locks back onto the drive chain or screw. If the door is open, you must manually lower it before re-engaging, as forcing it can damage the opener. After re-engaging, press the wall button or remote to test. If the door moves but reverses, the travel limits may need adjustment. For detailed troubleshooting on reconnecting your specific remote, refer to our internal article titled 'How To Reengage Garage Door Remote' at How To Reengage Garage Door Remote. For persistent issues, Atlanta Garage Doors recommends professional service to ensure safety and proper alignment.
To open a Genie garage door manually from outside, first ensure the door is fully closed, then pull the emergency release cord, which is typically red and hangs from the overhead track. This disconnects the trolley from the carriage. Next, locate the manual lock release on the outside of the door, usually a keyhole or a small handle near the center. Insert your key and turn it to slide the lock bar out of the track. Once released, lift the door from the bottom using both hands, keeping your back straight. If the door is heavy, use a sturdy ladder or have a helper assist. After re-entering, reconnect the trolley by pulling the cord toward the motor until it clicks. For persistent issues, Atlanta Garage Doors recommends scheduling a professional tune-up to ensure the spring system remains balanced and safe.
To re-engage a Genie garage door opener after using the emergency release cord, you must first ensure the door is fully closed. Pull the red emergency release handle down and then back toward the motor to reset the carriage. Next, simply press the wall button or remote control; the opener will automatically reconnect to the trolley. If it does not catch, manually slide the carriage toward the motor until it clicks into place. For a detailed guide covering power outages and specific models, refer to our internal article titled 'How To Open Genie Garage Door Without Power' at How To Open Genie Garage Door Without Power. For professional maintenance or service, Atlanta Garage Doors can ensure your system operates safely.

